SHEIN Free Trial: How to Test Products and Join the Program
Advertisements

Autonomous informational guide — Formulated using public references from Shein’s Free Trial Help section. We maintain no affiliation with Shein. Participant selection is randomized/selective and approval is never guaranteed. Always adhere to the official rules of each campaign.
If you have ever navigated to the Free Trial section and felt uncertain about how it works — that is completely normal. The system is easy to navigate once you understand the core sequence.
Below is a practical overview of how users enter, monitor outcomes, and post feedback. While selection is never guaranteed, sticking to the standard route helps prevent common errors that reject entries prematurely.
1- Access the Free Trial Hub
Sign in to your Shein profile. Inside the mobile application, navigate to your account panel → More Services → Free Trial Center. On desktop browsers, search for the Free Trial link within the community menu.
Explore the active catalog. Selection updates frequently, meaning products available today might rotate out shortly.
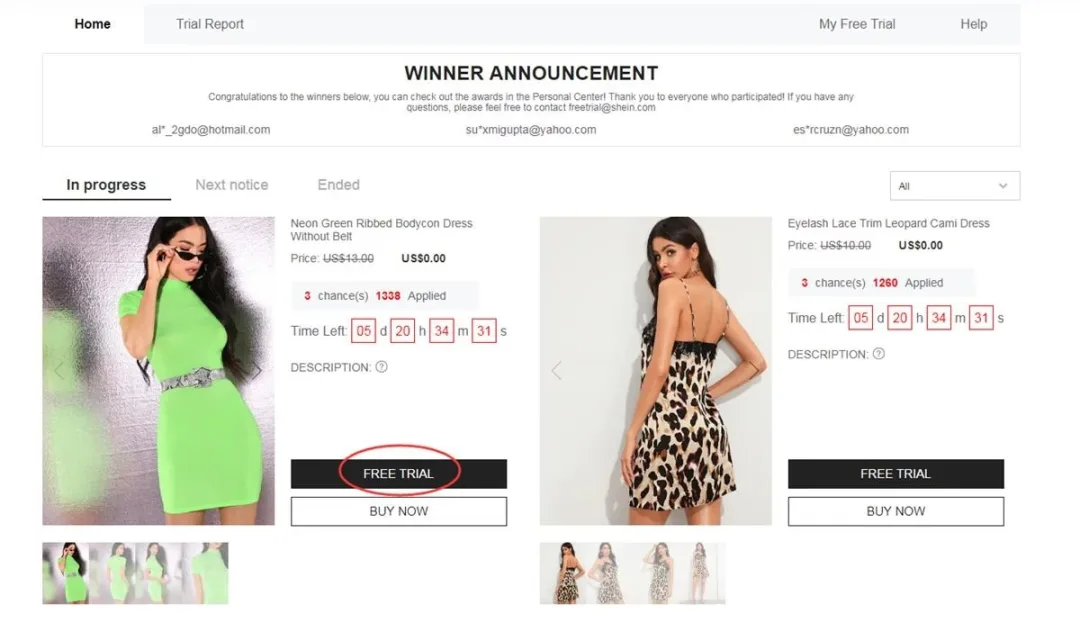
Visual overview of navigating into the Free Trial section
2- Request up to 3 items per week
You are allocated 3 application attempts weekly. Unused entries will not roll over into the following week.
When you spot a product you would like a chance to test:
Select Free Trial under the item
Pick your appropriate sizing option
Confirm a delivery address matching the regional site location you are browsing
Press Submit
Note: Mismatches between your shipping region and the website portal can void your entry. Verify these details prior to submitting.
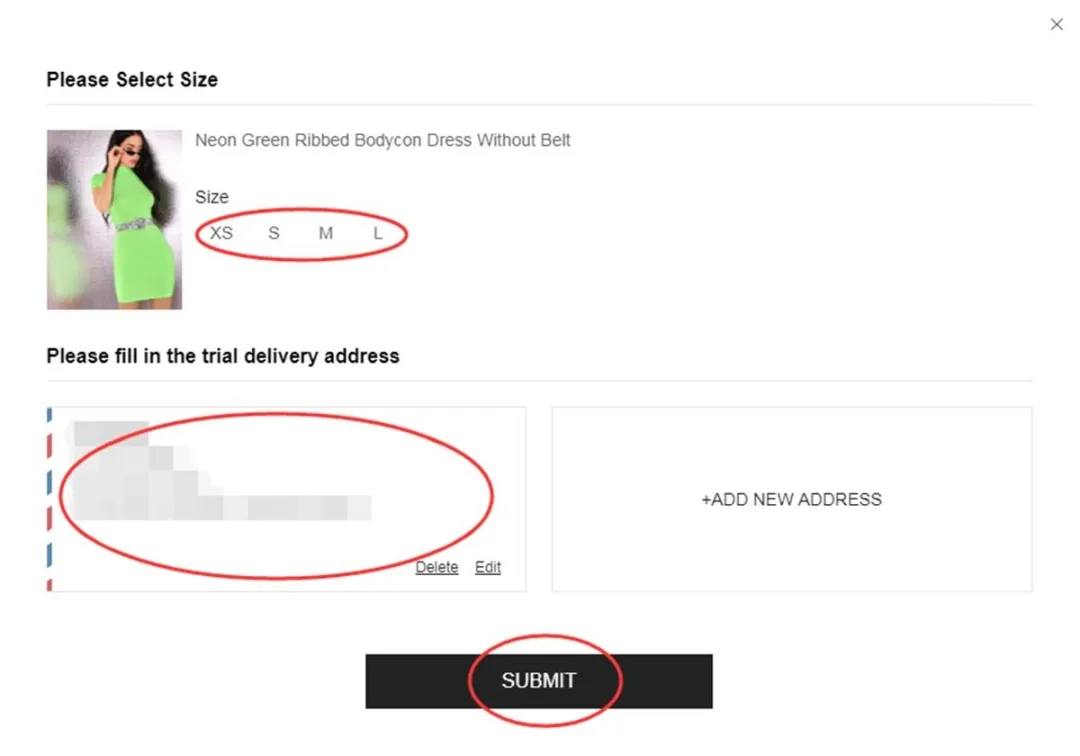
Sizing and location confirmation interface
3- Track status inside My Free Trial
Review periods typically take around 7 days. Head over to My Free Trial / My Requests to monitor progress:
Approved — Your entry was selected! A zero-cost order generates and dispatches automatically.
Failed — That request was not selected. You may reapply for alternate items once new slots refresh.
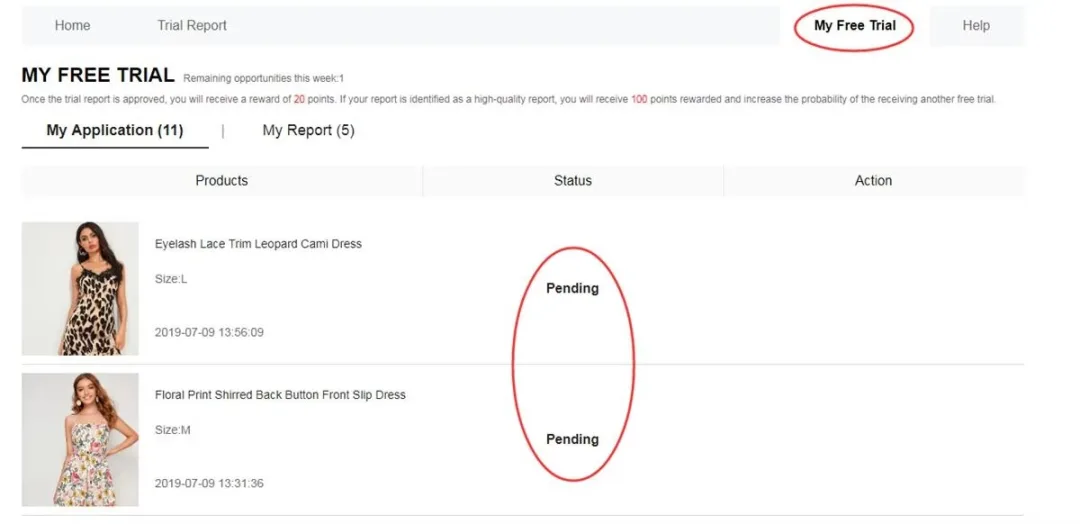
Interface for checking Approved or Unsuccessful requests
4- Evaluate the item and publish feedback
If selected and the product arrives, test it out and evaluate material quality, cut, comfort, and craftsmanship.
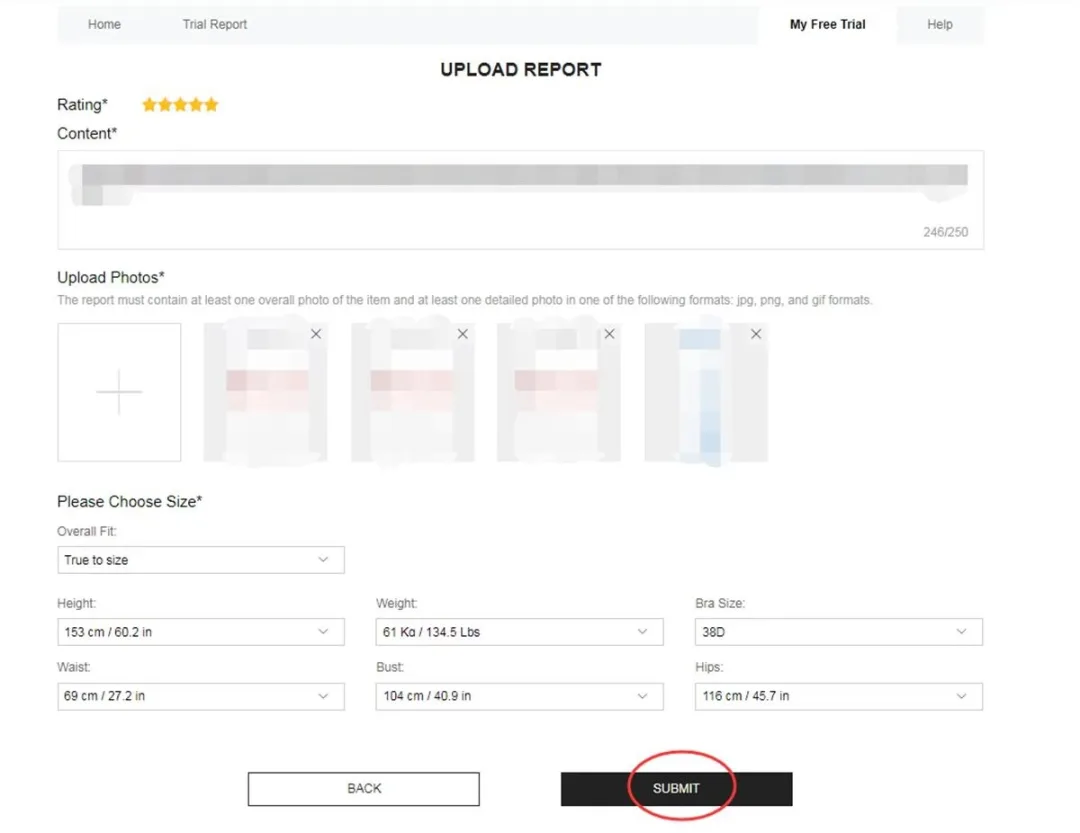
Then upload a comprehensive, candid review through your dashboard — ideally within 10 days of delivery. Track your submissions in My Report.
Best practices for review approval:
Include genuine pros and cons (avoid exclusively praise-focused text)
Upload crisp imagery — combining full-length wearing shots with detailed material close-ups
Provide specific observations regarding fit, feel, and daily wearability
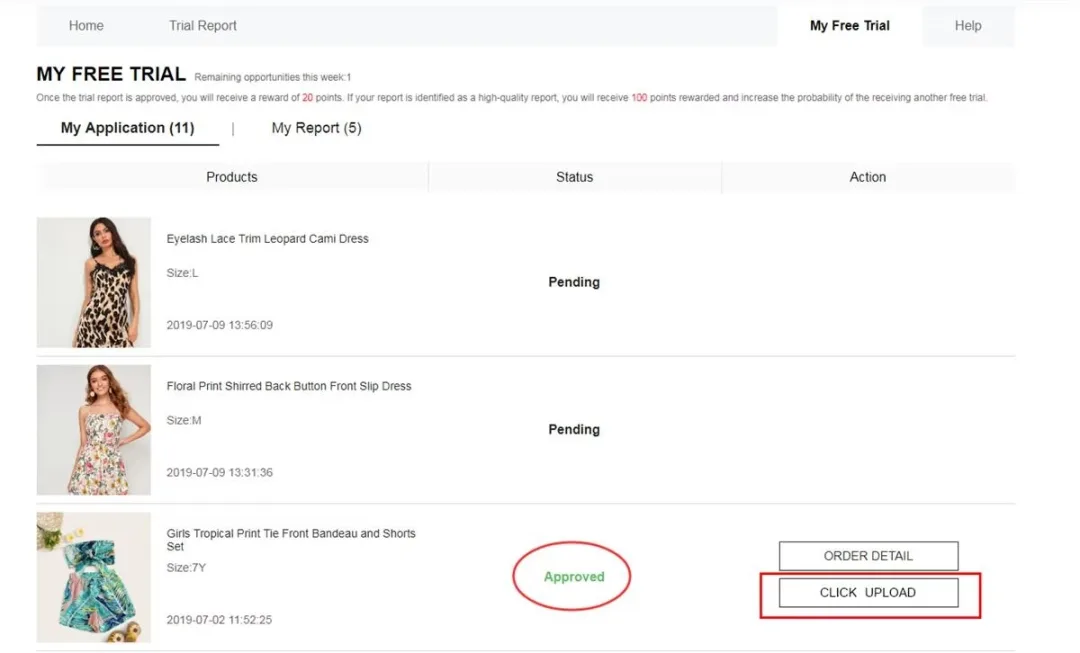
Feedback submission panel screen
5- Get Rewarded with Points After Approval
Check the My Report area to make sure your review passed inspection. Every approved report adds 20 points straight to your account. If your feedback gets selected as a "Quality Review," you will earn a 100-point bonus on top.
(Image: Reward panel showing approved reports and points added)
6- Edit and Re-upload Failed Reviews
If your review status turns up as Rejected, you get a second chance to clean it up. Click the Resubmit option in My Report. Write a bit more detail, replace any dark pictures with clear, bright photos, and send it in right away. Ignoring a rejected review can hurt your chances on future tries.
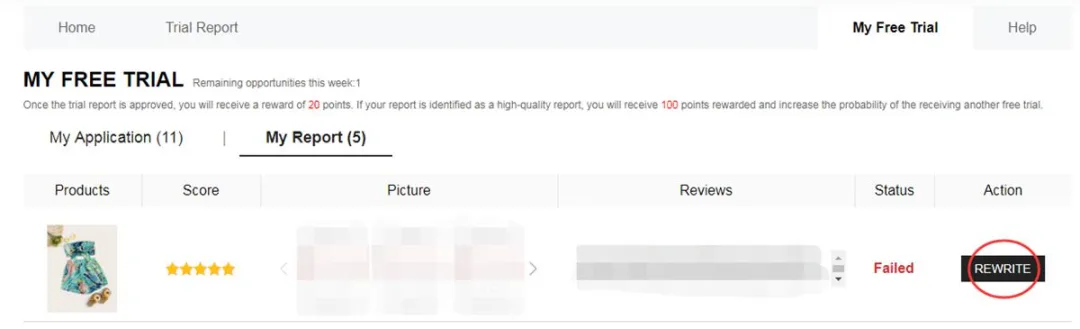
(Image: Button location to edit a review that needs changes)
Earning account points: Standard accepted reports can award around 20 reward points, while a High-Quality Report can yield up to 100 extra points.
If an initial review is denied, you are usually granted one resubmission attempt to make corrections.
Important guidelines to remember
• Limit of 3 attempts per week (they do not rollover)
• Delivery address must match the regional platform you are accessing
• Standard shipping fees are covered; local customs duties may still apply
• Try to complete feedback within 10 days following arrival
• Duplicate or fake profiles risk permanent exclusion from future trials
• Neglecting required reviews lowers future selection chances
Frequent errors that ruin application success
❌ Incomplete profile details or inaccurate sizing parameters
❌ Shipping address located in a different country than the portal
❌ Applying late after high-demand items have met entry capacity
❌ Brief, vague reviews lacking clear photos
❌ Missing the designated review deadline
❌ Running multiple accounts to gain extra entries
Frequently asked questions
Will I need to pay for shipping?
In most cases, standard delivery costs are covered. However, international customs duties may still apply depending on local regulations.
How many items can I apply to test?
Up to 3 requests per week. Leftover entries do not carry over into the next week.
Am I allowed to keep selected products?
Yes. If your application is approved, the items are generally yours to keep after submitting the required review.
How long does the selection process take?
Typically around one week. You can monitor Approved or Failed statuses inside My Free Trial / My Requests.
What happens if my review is rejected?
You are usually granted one additional attempt to modify and re-submit your review according to guidelines.
Is a large social media audience necessary?
No. Detailed, authentic review content and regular platform engagement hold far more weight than follower counts.
That summarizes the entire process: open the hub → request items (up to 3 weekly) → await results → if selected, test the product → publish authentic feedback with photos. Maintain an updated profile, apply promptly when products launch, and fulfill feedback obligations.
Ready to explore the Free Trial Hub?
Check current availability and apply using the guidelines above. Selection is determined by trial criteria and is never guaranteed.
You will be navigated to Shein’s official Free Trial Center platform.
Reference source: Shein Free Trial Help Center